
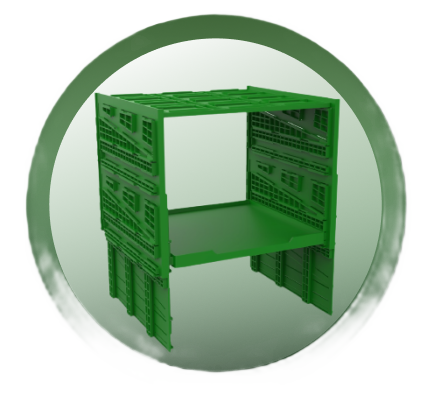
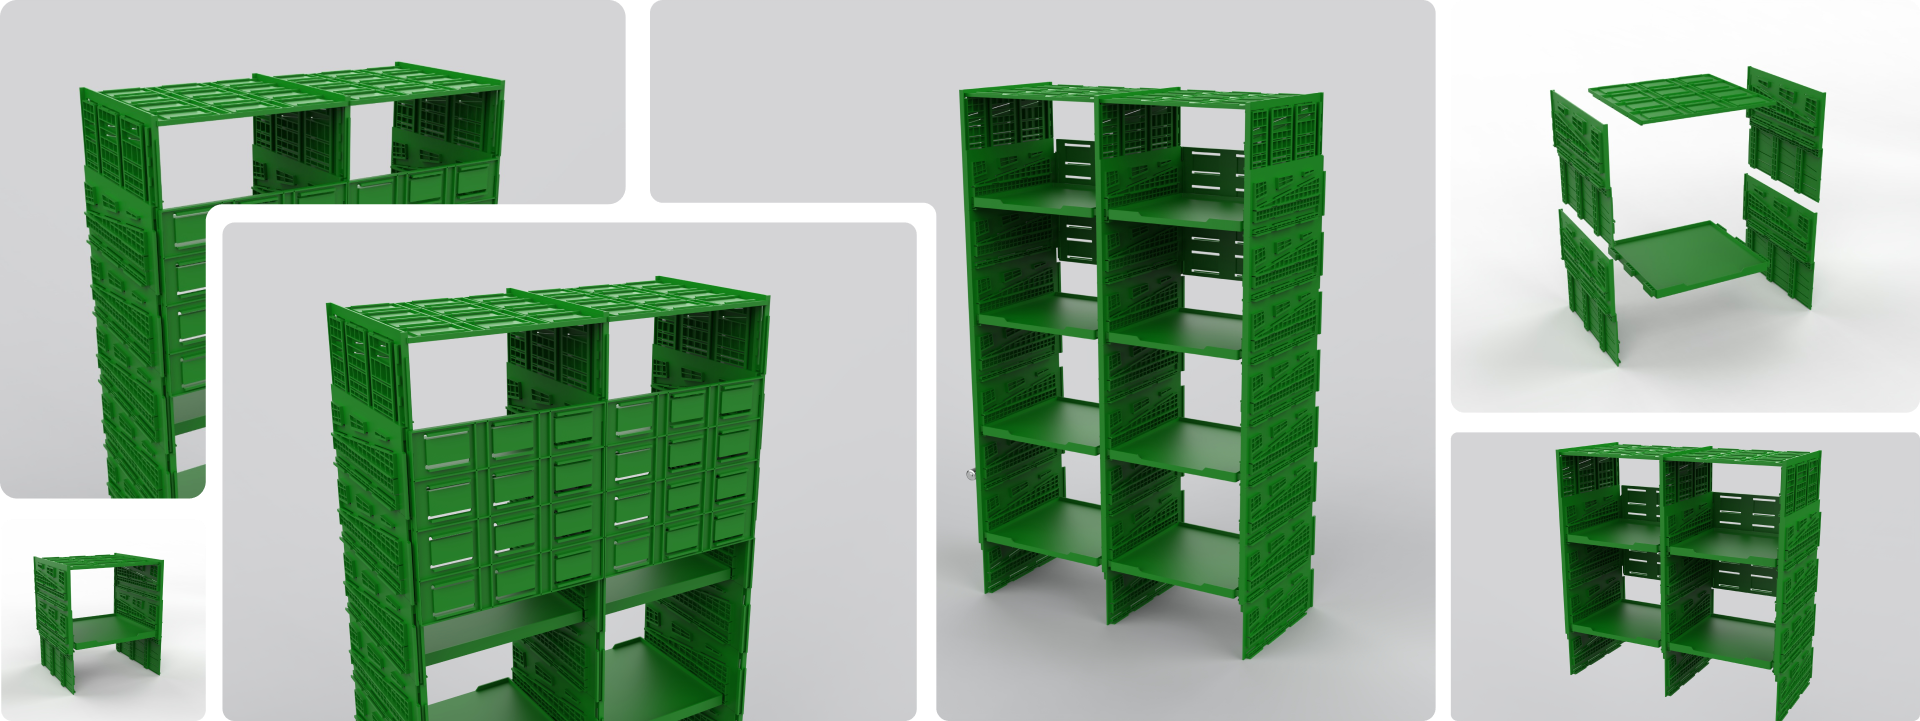
The BiB Rack, Reimagined
We are proud to announce our complete redesign of the BiB rack. No tools or hardware required for assembly. Can be assembled, modified or disassembled in minutes.

Why do we need a new BiB racks?
- Metal racks are inflexible. Need to grow from 2 BiBs to 4? Replace the old racks with new ones.
- Does the customer clean the floors with caustic chemicals? Be ready for corrosion.
- Available back-room space changing? Get rid of the old racks and buy new ones.
- Need to store or ship your BiB racks: Please reserve plenty of space.

Our configurable solution is here to help
01 Height, width and capacity easily changed
02 Slots for additional pumps are easily added
03 Parts are made of plastic
04 Easy to assemble
05 Corrosion free material
06 Can be easily recycled at the end of their life
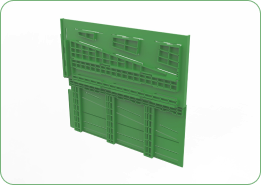
The Tray
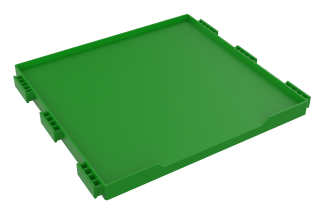
Holds the BiB flat or on an angle
The Rail
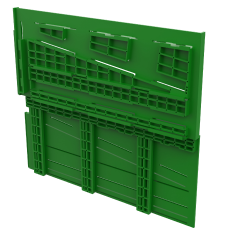
Can be stacked vertically to make either side
The Cap
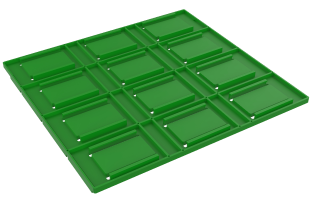
Can be inserted:
-Horizontally on top of the rack to hold equipment
-Vertically on the back of the rack to provide stability
-Vertically on top of the rack to hold syrup pumps
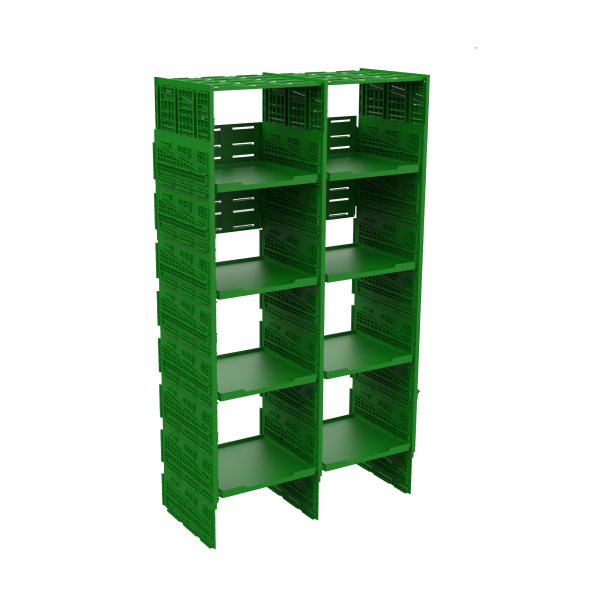
Structures of variable height and width can be configured using these same three parts in different combinations to meet your storage requirements
Configurator
Create and preview configurations of your choice.
BiB Rack Configurator
Please enter your:
1. Storage requirements
2. Pump location preferences and we’ll show you a sample rack
Components needed for this configuration
20 pcs
Rail
.png)
8 pcs
Tray
.png)
4 pcs
Cap
| Width(in) | Height(in) | BiBs Capacity |
|---|---|---|
| 80 | 40.5 | 4 |
Installation Manual
Follow these easy steps to get your rack set
.png)
Joining of Posts
Align the two posts end-to-end for assembly. Insert the provided connectors into the hollow ends of the posts. Check the alignment to ensure the posts are straight and firmly joined.
Attachment of Tray to Post
Position the tray horizontally near the posts. Align the tray’s mounting holes with the pre-drilled slots in the posts. Secure the tray to the posts using the provided screws and washers.
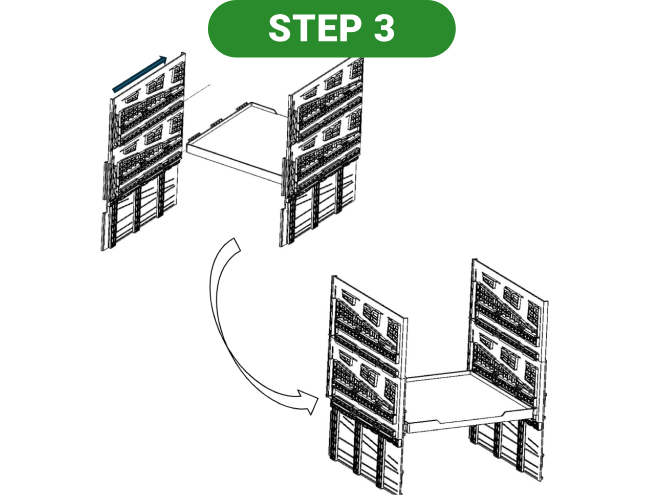
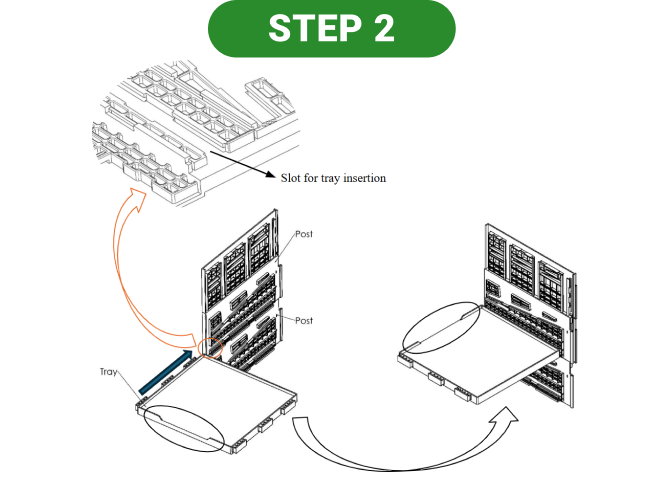
Connecting the Tray to Opposite Posts
Insert one side of the tray into the slots of the first column. Hold the tray steady while aligning the opposite side with the second column. Slide the tray into the second column's slots, ensuring both sides are level.
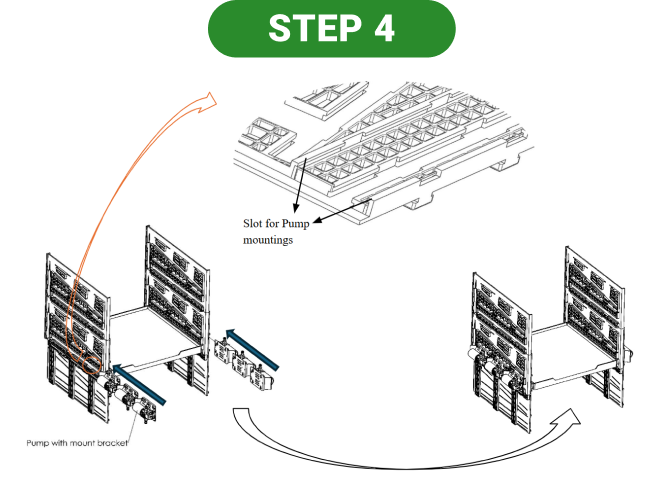
Attachment of Pumps to Post
Insert one side of the tray into the slots of the first column. Hold the tray steady while aligning the opposite side with the second column. Slide the tray into the second column's slots, ensuring both sides are level.
Tell Us What You Think
We have partnered with PolyVisions™ to offer an option for a rack that would be
Recycling category “1” and is made from a resin that consists of 91% post-consumer PET
The cost for this option will be 15-25% more expensive so we will also offer the option of making
The rack from ABS plastic that will be a recycling category “7”
Please select to indicate your preference.
DuraPET Material

- Completely Recyclable
- Costs slightly more
ABS Material
- Cost Friendly
- Not Completely Recyclable
Frequently Asked Questions
Ask a question here. We'll answer it and publish both question and answer to the community.
If you have more questions, you can reach out to us here: russ@charlessmithassociates.com
A single unit that can hold one BiB is 16 inches deep, 12 inches wide and 8.25 inches tall. Please go to the configurator for exact dimensions.
Each tray has been tested up to 150 pounds.
The various components have rails and slots that slide into each other. Screws can be applied in the rails for added stability.
Mid-2025